This section deals with all the necessary processes involved in using the Entry Editor for the first time. This includes:
| ► | A Checklist explaining what you need before you begin. |
Before you begin make sure you have:
| □ | A computer with a good internet connection. |
| □ | The latest version of your preferred web browser (we recommend Firefox 3). |
| □ | The Entry Editor Installer File (supplied by your Project Manager or System Administrator). |
| □ | Your username. |
| □ | Your password. |
If you do not have all or some of this information please contact your System Administrator or Project Manager who will be able to provide it.
![]() Note: Before using the Entry Editor you should first be familiar with the basic functions of the DPS Website as this is where you need to download your batches from. You should also have on hand the Quick Start guide relating to your job description.
Note: Before using the Entry Editor you should first be familiar with the basic functions of the DPS Website as this is where you need to download your batches from. You should also have on hand the Quick Start guide relating to your job description.
The Entry Editor is a Windows application and is installed using a standard installation wizard. You will need the Installer File which your Project Manager or System Administrator is responsible for supplying. If you do not have this file please contact the relevant person.
To install the Entry Editor:
| 1. | Launch the installer application by double-clicking on the icon: |
| 2. | You may receive a security warning like the one below. Assuming that your installer file has come from a trusted source (eg. IDM or your System Administrator) it is safe to click 'Run': 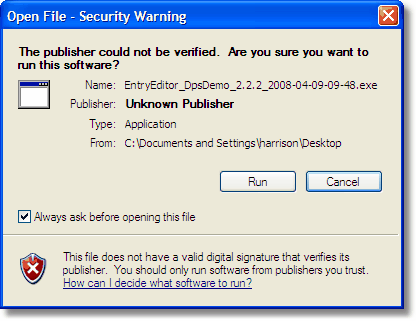 |
| 3. | When you see a welcome screen similar to this, click 'Next': 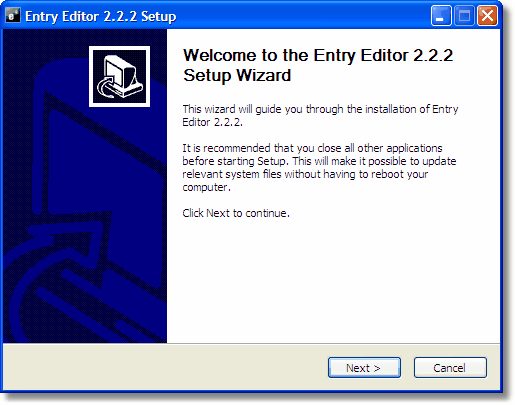 |
| 4. | Select the folder where you would like the application software to be installed. The default ('C:\Program Files\IDM\Entry Editor' on Windows XP) is usually the best option as it will place the files in your usual program folder and make them easily accessible; change it only if you have a special reason to do so. When you have made your choice, click 'Next':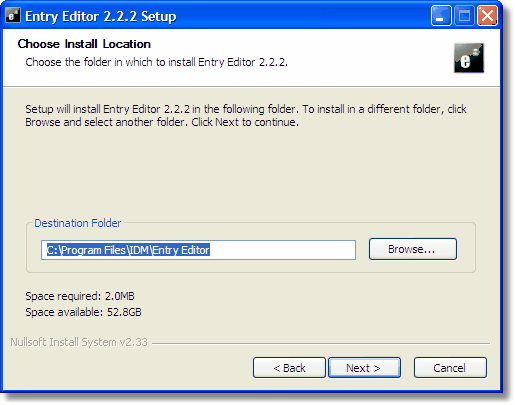 |
| 5. | Select the components to install. Leave the default (install everything) unchanged unless you have been instructed otherwise by your System Administrator. When you have made your choice, click 'Next': 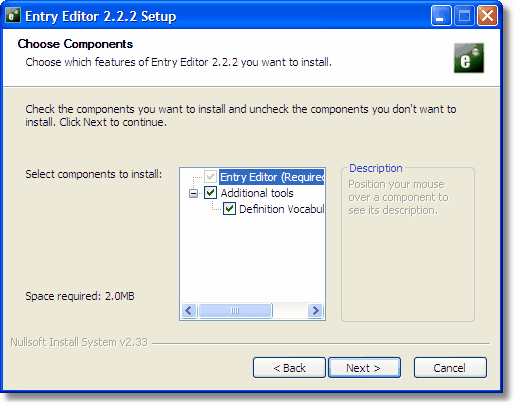 |
| 6. | Select the name and location of the folder in which to place the icon that launches the entry editor. The default (IDM\Entry Editor) is usually the best option: it will allow you to access the program in your usual Windows program list by clicking Start > All Programs > IDM > Entry Editor. You should only change the location and name if you have a special reason to do so. When you have made your choice, click 'Install':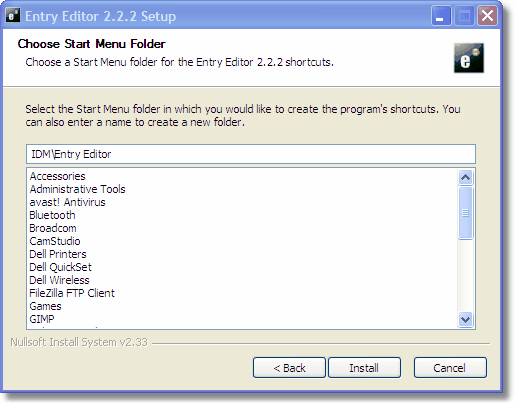 |
| 7. | The Entry Editor installation will commence and should take only a few seconds. When it is complete, you will see this screen: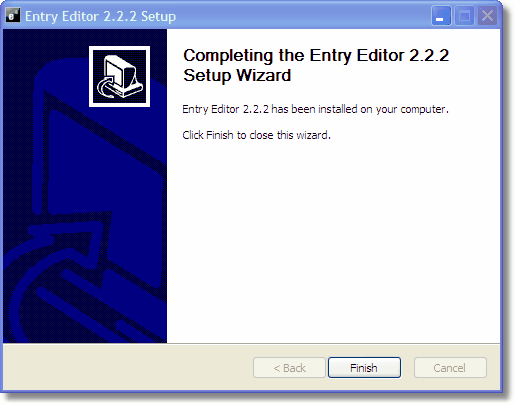 |
| 8. | You may be asked to reboot your computer before starting to use the Entry editor. If so, please follow the on-screen instructions. |
| 9. | Click Finish to close the installation wizard. After the first installation is complete you will need to Update the Entry Editor. |
Once you have installed the Entry Editor you will need to update the files to ensure you have the latest configuration files that relate to your specific project. You should do this manually immediately after installation.
There are two ways the Entry editor gets updated: manually or automatically.
Automatic update will update the configuration 'behind the scenes' for projects you are working on. You will be asked to restart your Entry Editor if a new configuration has been downloaded before it takes effect, but otherwise you don't need to do anything.
The status of the update is displayed to the bottom left
![]()
| • | Arrow is task in progress |
| • | Green is successfully completed tasks |
| • | Yellow is completed tasks, but with warnings |
| • | Red is failed tasks. |
Clicking each of the icons will display information about the specific tasks
But you can also update your Entry Editor manually at any other time. You will need to do that when the Entry Editor needs to know about a new project.
To update the Entry Editor manually:
| 1. | Launch the program from your Start Menu (usually in the bottom-right corner of your screen): Click Start: All Programs: From the program list, select IDM > Entry Editor > Update Entry Editor: 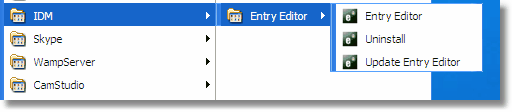 |
| 2. | If you are authorized to access more than one repository, you will be asked which one to use. Your Project Manager should have told you which one to choose. |
| 3. | Fill in your login details (username and password). These are the same as the ones you use to access the DPS Website (see Getting Started (DPS Website)). |
| 4. | The Editor Update dialog box will indicate if any configuration files on your machine are out of date by displaying them as red bars. Click Begin Update to download the latest versions: 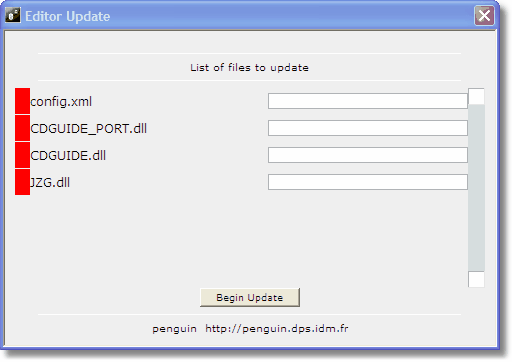 The update will begin: 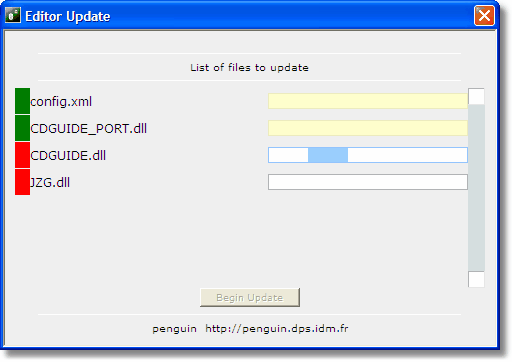 |
| 5. | The update is complete when the red bar next to all the filenames has turned green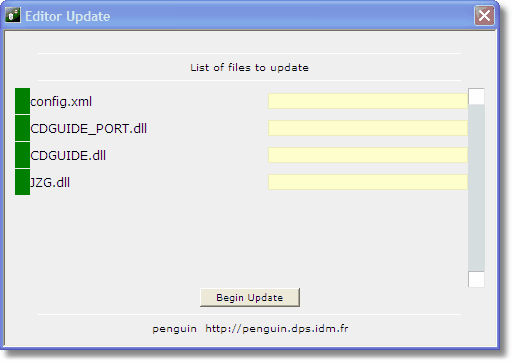 |
| 6. | Close the dialog box by clicking the 'x' button |
![]() Note: After you have used the Entry Editor, the update dialog will not ask you which repository to use; it will always use the same one that was accessed in your last editing session. If you are working on more than one project please see the special instructions in Working on Multiple Projects.
Note: After you have used the Entry Editor, the update dialog will not ask you which repository to use; it will always use the same one that was accessed in your last editing session. If you are working on more than one project please see the special instructions in Working on Multiple Projects.
Updating the Entry Editor from dps2.7
From dps2.7 you will not need to do the manual install described above anymore. The Entry Editor will be notified of which projects you are assigned to and download the configurations as and when they or your assignments change.
If you want to do it anyway, you can use the button in the login screen or via the menu item configuration update within Config.
The Entry Editor is a standard Windows application that you can launch as you would any other program. The two most common methods are:
| 1) | Launch the program from your Start Menu (usually in the bottom-right corner of your screen): Click Start: All Programs: From the program list, select IDM > Entry Editor > Update Entry Editor: Note that this assumes you have installed the application with the default options which places the programs files in the Program Files folder on your C:\ drive. |
| 2) | Double-click on the shortcut icon on your desktop: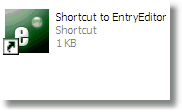 This icon will be created during installation if you selected the option to create a shortcut. If you don't have the icon you can create one very easily yourself by following the instructions on your system's help menu (e.g. if you are working on Windows XP you should search the Windows help for instructions). |
The first time you launch the Entry Editor, you may be asked to select a Repository:
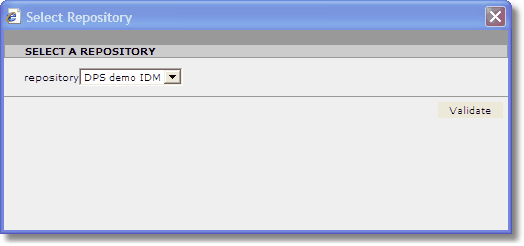
The available repositories are presented in a drop-down list. These should include the one for the project on which you are due to start working, but there may be others: some companies maintain more than one DPS repositories if they have multiple projects. Your Project Manager should have told you which to select. Make your selection then click 'Validate'.
When you have chosen a repository you will be asked for a user name and password to log on to it. Enter the same ones that you use to access the DPS website. The Entry Editor remembers your choice of repository and your username, and you can optionally ask it to remember your password.
![]() Note: the Entry Editor will not ask you to select a repository if you are authorized to use only one repository. In this case that repository will be selected automatically.
Note: the Entry Editor will not ask you to select a repository if you are authorized to use only one repository. In this case that repository will be selected automatically.
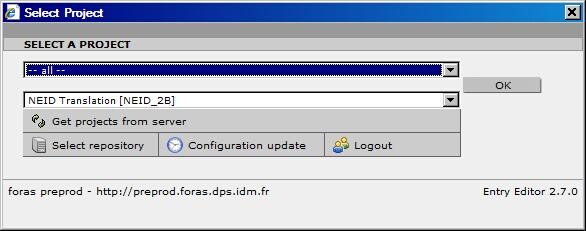
When you have launched the Entry Editor, then chosen your Repository, you will be asked to select a Project:
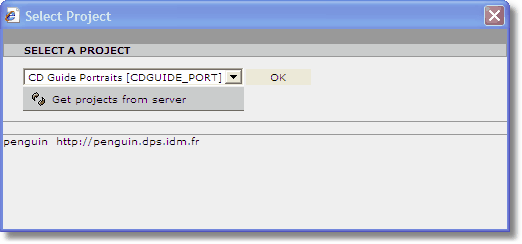
Choose an option from the drop-down list and click 'OK'. Your Project Manager should have told you which to choose. If your project does not appear on the list, click on 'Get projects from server'. This updates the choice of available projects by asking the server for an up-to-date list. If it still does not appear on the list you may not have the most recent configuration file. This is a technical issues so you will need to contact your System Administrator.
![]() Note1: You will always be asked to select a Project whenever you launch the Entry Editor.
Note1: You will always be asked to select a Project whenever you launch the Entry Editor.
The Entry Editor can work on only one project at a time but you can change the active project in the Entry Editor home page:
| 1) | Click the 'HOME PAGE' icon |
| 2) | A screen will appear with a list of projects you have access to:
|
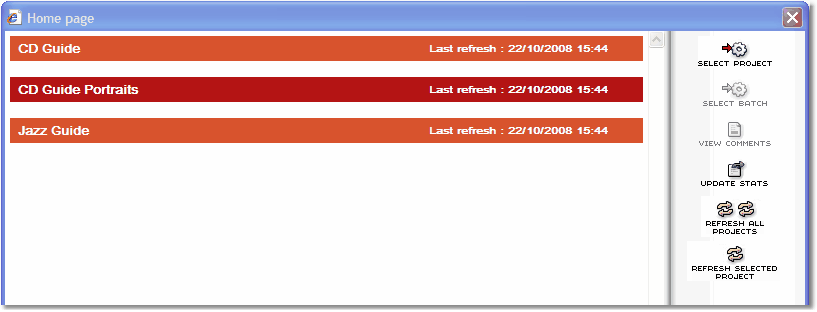
| 3) | Click on the project you want to change to, then click the 'SELECT PROJECT' icon |
| 4) | If you have many projects to choose from, it may be possible to limit them by using the group selector top left. This is available if the administrator has grouped the projects. |
![]() Important note: it is possible to have more than one copy of the Entry Editor active at the same time, each working on a different project, but you will need to follow a special installation procedure. Please ask your System Administrator for instructions.
Important note: it is possible to have more than one copy of the Entry Editor active at the same time, each working on a different project, but you will need to follow a special installation procedure. Please ask your System Administrator for instructions.
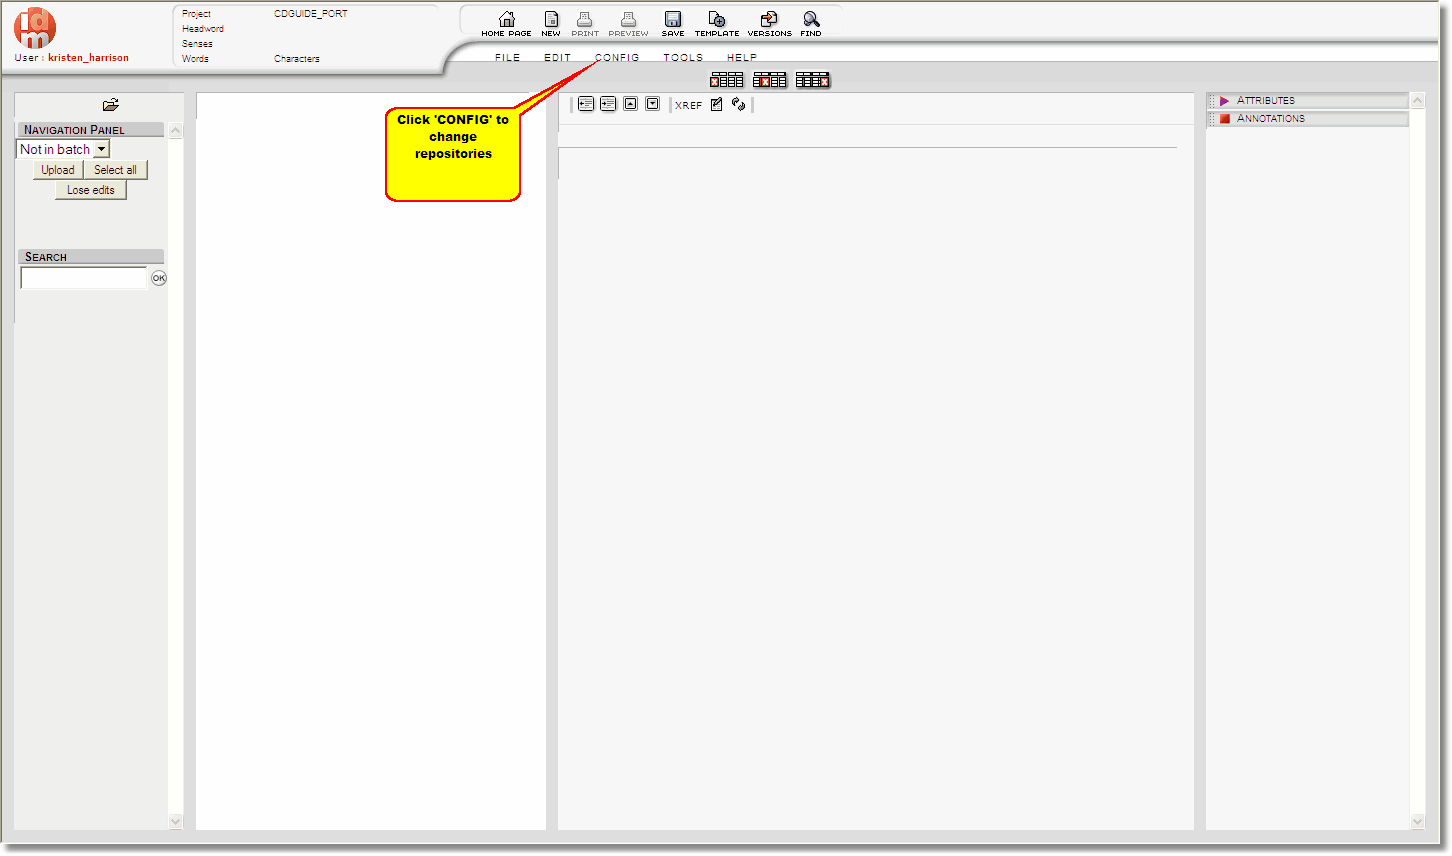
To change the active Repository:
| 1) | Select 'CONFIG' in the menu at the top of the screen:
|
| 2) | Select REPOSITORY from the drop-down list: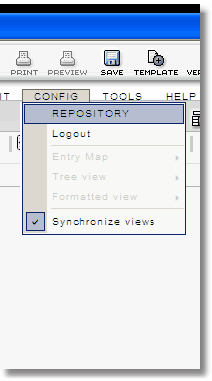 |
| 3) | The 'Select a Repository' dialog box will appear. Select the new Repository from the drop-down list then click 'Validate': |
![]() Note: The change of Repository will take effect the next time you launch the Entry Editor.
Note: The change of Repository will take effect the next time you launch the Entry Editor.
Help and Support
If you have any problems with installation or login please contact your System Administrator or Project Manager to verify you have the correct login information. If the problem persists, ask your Project Manager/Administrator to contact the technical staff at IDM.